Saturday, November 3, 2012

Sweet Kabochu Squash Soup

This is one of my favorite fall/winter vegetables, the versatile Kabochu Squash.  It's full of beta-carotene and a good source of iron, fiber, potassium, vitamin C and contains traces of calcium, folic acid and B vitamins. 

I found this Japanese Pumpkin at our local Farmers Market and decided to give it a try.  It's delicious and I made it into a soup.  Nothing beats a nice warm bowl of Sweet Kabochu Squash on a cold day!

Yummy fact: The skin is completely edible when roasted and or steamed.  It also contains fiber so keep it on for added nutrition.  

It's popular for it's strong yet sweet flavor and moist, fluffy texture.  Much like that of a sweet potato.  

Ingredients: 
1 Kabochu Squash
Almond Milk, coconut milk or your preference
Water (optional)
Cinnamon 

Need: 
Blender
Either a baking pan or strainer and pot *

Directions:

1. Rinse Kabochu Squash.  Cut the Kabochu in half - it's quite difficult to cut so be careful (Note: Cut on one side of the stem.  It makes cutting a little easier).

2. Scrape out the seeds with a spoon (save the seeds for cooking.  They are just as good and nutritious as pumpkin seeds). 

3. Either place squash, cut sides down on a baking pan and bake for 1 hour at 350 degrees 
or cut squash into pieces, bring 1-2 inches of water to a boil in a pot, add squash in a steamer basket, cover and steam until tender or easily pierced with a fork (about 10-20 min).


4. Remove and set aside to cool.  To cool squash pieces that were steamed, spread out on baking pan.


5.  Cut cooled squash from skin and place pieces into blender.  Add milk or water (your preference in amount.  For thicker add about 1/2 cup for thin soup add 1 cup or more). Add cinnamon (again, your preference depending on your taste) and blend.  


6.  Pour into bowl and enjoy!


This soup can be prepared in a variety of ways.  Next try adding vegetables such as onions, carrots, garlic cloves, mushrooms and chicken broth (in place of milk) 

-Theresa


Thursday, October 18, 2012

3 Easy-To-Make Delicious Raw Desserts!


Craving desserts and looking for healthy options? 

Below are three easy-to-make raw dessert recipes.  No stove required.  

Enjoy!


Chocolate Pudding (Raw, vegan, gluten and soy free)

Servings: 1-2
Prep Time: 5 Minutes

Ingredients

1 Avocado (pitted & peeled)
3 Tbsp cacao powder
1/3 cup raw agave nectar or 4 soaked dates
½ tsp sea salt
2 tsp vanilla extract 
½ cup water (or more depending on your desired consistency)

Directions
  • In a high-speed blender, combine all ingredients until smooth. 
  • Pour into serving dishes and chill or eat immediately. 
Bonus: Vanilla is a natural aphrodisiac (as is cacao). It relieves anxiety, and is high in anti-oxidants.

Brownies (Raw, vegan, gluten and soy free)

Number of Servings: 12
Prep Time: 15 Minutes

Ingredients

For the Brownie: 

1 cup walnuts 
1 cup dates 
1/4 cup cocoa powder 

For the Icing: 

2 avocados 
1/2 cup agave nectar 
1/4 cup cacao powder 
2 Tbsp coconut oil 
1 Tbsp vanilla extract 
Dash salt 
Dash cinnamon

Directions 
  • Food process the brownie ingredients until blended and dry chunky. 
  • Press into a small pan. (9x9 works well!) 
Icing: 
  • Put all icing ingredients into Vitamix blender, and blend on high until smooth. 
  • Spread icing over brownies and place in freezer to set for 1 hour. 
  • When you are ready to serve, cut into 12 servings and enjoy! 
Eggnog 

Yield: 2-3 Servings
Prep Time: 5-10 minutes

Ingredients

½ cup raw almonds 1 ½ cups filtered water OR 1 ½ cups homemade raw almond milk
2 frozen ripe bananas
1 pitted date soaked for about an hour
¼ tsp natural pure vanilla extract
¼ tsp ground nutmeg
¼ tsp ground cinnamon
pinch ground cloves
pinch of Celtic sea salt

Directions
  • Place all ingredients in your blender and puree until smooth and creamy. 
  • Add more water to achieve desired consistency.
  • Sprinkle with cinnamon and serve immediately. 
Almonds are a great source of protein, vitamin E, and fiber, while spices like cinnamon can reduce your blood pressure and taste delicious!

Source: Amanda Froelich, http://www.mindbodygreen.com/0-6517/5-EasytoMake-Raw-Desserts.html, October 18, 2012 

Saturday, September 29, 2012

6 Natural Ways to Prevent the Cold or Flu

 
With cold and flu season right around the corner, pharmacies are already advertising flu shots and conventional drugs. There is, however, a holistic alternative: natural, preventative practices that significantly lower your chances of getting sick. 
It essentially boils down to a two-pronged approach: stay away from germs, and boost your body’s natural immune defenses.
Here are 6 practical tips for a symptom-free cold and flu season:

1. Eat real food. Eating a healthy diet rich with fresh and cooked vegetables, healthy fats (like salmon and coconut oil), and a variety of wholesome proteins goes a long way in maintaining optimal health. Increasing immune-supporting foods like raw garlic, ginger, lemons, honey, nuts, seeds, and yogurt can also ensure that your body gets sufficient nutrients to fight off potential invaders.
2. Get adequate sleep. Your immune system functions best when your body has time to repair and re-energize. Aiming for 8 hours of sleep every night not only boosts immunity against colds and the flu, it decreases the potential for all diseases and provides you with mental clarity throughout the day.
3. Avoid touching your eyes, nose, and mouth, except immediately after you’ve washed your hands. Bacteria lives on shared objects, such as doorknobs, and can easily infect you through these entry points on your body.
4. Skip the crowds. This might be a challenge for commuters and kids, but germs are more likely to spread in densely populated areas. If you can’t avoid exposure to crowds, then prepare yourself with supplements of zinc and vitamin C.
5. Stay Active. Physical activity helps the body release toxic buildup that otherwise creates a welcome environment for a cold or flu. So don’t let the end-of-summer slump slow you down!
6. Be positive. We naturally grow more inward as the days get shorter and darker, but that’s no excuse to let emotions get the best of your immune system.  Happy people are less likely to get sick, so stay social, laugh, work on your hobbies, and make plans for the future.
One final thought: Unless you have a weakened or compromised immune system, getting a cold or the flu is hardly cause for alarm. It is typically a sign that we need to step back and relax. Early detection can help speed your recovery, so make time for your health - especially steps 1 and 2 - as soon as you detect cold and flu symptoms.
How do you stay healthy during cold and flu season?
 Institute for Integrative Nutrition.  2012. Diana Chaplin.  September 20, 2012. http://blog.integrativenutrition.com

Sunday, August 5, 2012

Healthy Snack: Roasted Chickpeas!

Awww YEAH!!!! I found my new favorite snack....roasted chickpeas.  Not only are they simple to make but they are filled with protein, vitamins and minerals.  Also, there's plenty of different herbs and spices you can use to suit your taste.  Salty, sweet, spicy...the combinations are endless! 


Ingredients: 

Chickpeas, drained and rinsed
Extra virgin olive oil
Cumin
Paprika
Garlic salt
Garlic powder
Pepper

Directions: 

Preheat oven to 400 degrees
Drain and rinse chickpeas and place in medium bowl
Add olive oil, spices of your choice and mix until evenly coated
Line baking sheet with parchment paper
Transfer chickpeas to baking sheet and spread them into an even layer
Bake for 20 minutes, stir and bake for another 10-15 minutes
Allow to cool slightly and enjoy!

More ways to flavor your chickpeas -
Garlic, Pepper, Rosemary
Cinnamon and Honey
Tarragon, Fennel, Roasted Garlic, Honey, Lemon Juice

Thursday, June 28, 2012

Homemade Almond Milk.....Mmm Mmmm Gooood!

Finally.... I made almond milk!  Check..check.....check it out.  =)


If you love coffee as much as I do and need to have almond milk to go along with it (because a morning without it is just not the same) then you rock, I mean...you get it.  I obviously ran out of almond milk that afternoon and couldn't make it to the store (TJ's - best store evaaaa) that day because of my hectic schedule (this is the truth, I was super busy) so I said to myself "today's a perfect day to soak those almonds".  Later that evening I had delicious almond milk.


Alright, enough chit chat. . . .here's how you can make it.


It's actually a fairly easy process.  You'll need:

  • Blender
  • Metal strainer
  • cheese cloth (I did not use but will the next go-around)
  • 1 1/2 cups raw almonds
  • 4 cups water
  • 1 tsp vanilla extract

optional: 1 1/2  tbsp honey or maple syrup, dash of cinnamon.


To start, soak the almonds.  Cover with water and soak for 8-12 hours.  This softens them and makes them easier to blend.


After you've been so patiently waiting, strain the water and add the soaked almonds to your blender.  


Add the water**(see note below) and blend for about 1-2 minutes.  


Add the vanilla extract as well as any other ingredients desired and blend for another minute until completely smooth and frothy. 


Give the almond milk a taste and adjust if needed with vanilla, honey and or cinnamon.  
Next, grab your strainer and a bowl.  Pour the almond milk through the strainer in batches, depending on the size of your bowl and strainer.  You can't really see my bowl in the pic but it's there. 


Use your clean hands or spoon/spatula to press down on the almond solids to help the almond milk through. 

You'll be left with almond meal in your strainer.  Save this and use for baking or in other recipes.  I add to my oatmeal and berries for breakfast. 

Finally, pour almond milk in a container to refrigerate and enjoy! 


**after doing this I would recommend starting with 1 1/2 cups water, blend and then add the remaining 2 1/2 with the vanilla. 

Also, some recipes call for several layers of cheesecloth to use inside the strainer.  This prevents the almond solids from sneaking through the strainer.  Suggested but not necessary. 

So overall a success.  Next I think I'll give cashews a try.  

Enjoy!

Friday, June 22, 2012

Mean Greens!


7 reasons why Juicing Greens is incredibly beneficial

1. Fastest way to alkalize our bodies (helps eliminate inflammation and acids in our bloodstream)
2. 100% Pre-digested. (Goes into our bloodstream immediately, reaching everyone of our 100 trillion cells, bathing and bringing powerhouse nutrients and oxygen.)
3. Enzyme rich - These greens are power-packed with plant based enzymes that help 'eat' up undigested particles in our bloodstream, helping to heal our bodies.
4. Instant Energy! Green juices give us more energy than any other juice can give to us!
5. Low-Glycemic - Green juices are low glycemic and just about any human being can drink them, even if they are diabetic.
6. Power of Photosynthesis! Green juices are literally bursting with the power of photosynthesis. This means that the conversion from the sun to the plants are now present inside your body when you drink these greens.
7. Helps with Elimination efficiently! You would be surprised to see just how wonderful green juices can help heal the stomach lining, esophagus and small and large intestine.

Give this recipe a try and let me know how it goes!


  • 1 Large Lime Juiced (skin and all)
  • 1 cup Spinach
  • 1 cup Parsley
  • 1 Green Apple
  • 6 ribs Celery
  • 1 large Cucumber (peeled)


Info and recipe by Jay Kordich

Wednesday, May 30, 2012

9 Ways You're Overspending at the Grocery Store

How many of us look at the grocery receipt on our way out of the store thinking "S*#^, this is definitely more than I wanted to spend"? . . . I bet quite a few.

Since food is pretty much an item you have to purchase (no one likes to go hungry) there are many ways you can avoid overspending on groceries.

Here's 9 ways to save some $$.


1. Pre-packaged Salad -  It really is convenient to have your lettuce already cleaned and trimmed in plastic tubes but it also costs nearly three times the price.  Save a few bucks a month and purchase a head of lettuce, wash and trim right away and you'll have it ready to use.  Do this right after the groceries are unloaded.

2. Caned Beans - Yes, beans in a can are already cooked and easier (less maintenance) to prepare for meals than dried bagged beans.  If you have the time just put beans on the stove 20-30 minutes prior to prepping your other food items and they'll be done before you know it.  I do recommend soaking beans for at least 12-24 hours before cooking.

3. Bottled Water - Did you know drinking four 16 oz. bottled water a day (recommended amount) equates to $120 dollars a month? Are you crazy?? This is something you can get straight from your faucet for FREE.  Obviously Bottled water is a billion dollar industry.
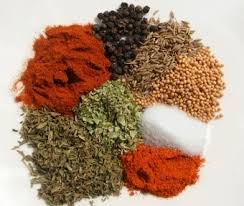
4.  Fancy Spice Mixes - Many spice mixes and marinade rubs you can make on your own.  You probably have most if not all of the seasonings already on hand.  Next time you're thinking of making this purchase read the ingredients on the back, write them down and create your own spice mix.

5.  Microwave Popcorn - Sometimes you can pay almost double the price just for the convenience of having individual microwavable bags but most of us don't have the luxury of popping our own.  If you do, then in fact, I suggest doing just that.  Add your own butter, salt and other fixings.  Not only will it be a lot healthier but you'll save some moolah!

6. Exotic Spices - Taking the time to make a trip to an international market can save you a ton (almost 10 times in savings) on spices and specialty ingredients.  It may be out of the way but if you like to experiment with your cooking then why not check out other food items while you're there.  Who knows what you'll find.
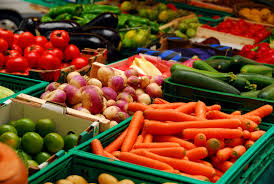
7. Out of season produce - It's the basic law of supply and demand.  When crops are in season you'll be rewarded financially by purchasing what's in season now.  There's many factors that go into having a crop shipped in from 3000 miles away.  For example, those crops must be harvested early and refrigerated so they don't rot when transported.  Doing this disrupts the flavor immensely.  Does that sound appetizing?

8. Fresh Herbs - Save by starting your own herb garden.  You can often buy the entire plant for less than you can a few sprigs at the grocery store.  Even if you don't have enough room for a garden here's hoping you can fit at least a few pots somewhere in your home.

9. Pre-cut fruit - This is something you can easily do yourself.  Yes, it may take a little bit more extra time to do but I would think it would be worth the savings.  Unless, at that particular moment, you need something quick to go, then I'm for it.  Better than junk food!


Even though replacing some of these items with others (for example, dried beans vs canned beans) won't break the bank, every little bit will add up.  Also, it's always a good idea to wait until these items go on sale.

Happy Shopping!

Source: http://www.huffingtonpost.com/2012/05/23/money-saving-tips_n_1537035.html

Tuesday, May 22, 2012

Don't let the rain dampen your Workout!

Neoprene Dumbbells 15 lbs
So much for heading outside today for a workout.  Looks like the weather folks are calling for rain all of these week (at least here in NY).  At first I was a little annoyed but I think I'd rather have it rain during the week vs having it rain this (Memorial Day) weekend.

Here's hoping to nice weather this weekend.  I just checked the forecast and they're calling for more rain.  NOT COOL.

Well...if it's so, the rain will not make me miss a workout this week.  Unfortunately I won't be able to go for a run but there's plenty of options for getting my sweat on in my apartment.  

Here's what I did yesterday.  3 x's through.

1. Half burpee and raise with half bosu (10-15)
2. Chest fly on stability ball (20)
3. One-leg one-arm row (15 ea.)
4. Leg raises (20)
5. Static lunges with bi curl (20)
6. oblique crunches - legs straight (20 ea.)
7. tri ext on stability ball (15)
8. squat thrusts (15)

Feel free to save for a rainy day.  I understand you may not have this equipment at home but use your imagination.  Use your coach, stepper, chair, etc. 

Got questions? Email me

Sunday, May 20, 2012

Where do I get my protein from other than animal meat


The question "Where do I get my protein from other than animal meat?" is often asked by many - mostly meat eaters but also newbies converting over to the vegan side.


Do you wonder how you're going to stay fit and lean, build muscle and still find the right foods to maintain a healthy diet? Not to fret - below I've listed a handful of sources in which you can get your adequate amount of protein in each meal.

Veggies - 2 cups of cooked Kale has 5 grams of protein, 1 cup of spinach - about 7 grams of protein, 1 cup of peas - 9 grams.
Quinoa - about 9 grams of protein per cup
Tofu - 4 ounces has 9 grams of protein
Nut butters - a tablespoon will get you about 8 grams of protein
Non-dairy milk - 1 cup of soy or almond (depends on brand and flavor) contains 7-9 grams of protein
Lentils - one cup cooked has a whopping 18 grams of protein
Beans - you'll get about 13-15 grams of protein per cup
Tempeh - one cup provides 30 grams of protein
Hemp seeds - 3 tablespoons has about 16 grams of protein
Spirulina - 10 grams provides 6 grams of protein

It is very easy for a vegan diet to meet the recommendations for protein.  In fact, one (vegan, vegetarian, etc.) can survive without meat, eggs and dairy and never suffer a protein deficiency.

Here's a few athletes and (in my opinion) in shape celebrities that don't eat meat.


Prince Fielder - First baseman for the Milwaukee Brewers
Dave Scott - Iron Man World Championship record holder
Rich Roll - two-time top finisher at the Ultraman World Championships
Carl Lewis - World famous track star
Bob Harper - Biggest Loser trainer
Hilary Swank
Natalie Portman


Sources: http://www.mindbodygreen.com/0-4771/10-Vegan-Sources-of-Protein.html
http://www.mindbodygreen.com/wc/rich-roll

Monday, April 23, 2012

Veggie Pizza with Cauliflower Crust

It's Homemade Pizza time again! Although, this time I've decided to make the pizza crust versus use gluten-free tortillas as a crust.  End result - It turned out AMAZING!  

This has got to be the best Pizza Crust EVER and there's a variety of ingredients (really just different cheeses and herbs) you can use to make each crust different.

This is super easy to make and gluten-free!!

CRUST:
2-3 cups shredded cauliflower (half of the head of cauliflower)
1 egg
1 cup finely shredded cheese (mozzarella, chedder, pepperjack..your choice)
1 teaspoon dried oregano
1/2 teaspoon dried minced garlic (or fresh garlic)
1/2 teaspoon onion salt


1. Shred the cauliflower into small crumbles using a cheese grater.  Place the cauliflower crumbles in a large bowl and microwave (dry) for 8 minutes. Let cauliflower cool.

** OR cut florets into medium size pieces and steam until cauliflower is tender. 

2. Preheat the oven to 450 degrees. In a medium bowl, mix or mash (using a potato masher) the cooked cauliflower crumbles with the herbs (and cheese if you'd like to add a kick).  Pat the "crust" into a 9 inch round on a non-stick cookie sheet or pizza pan.  Bake for 20-25 minutes (or until golden). Remove the crust from the oven.

3. Spread sauce on top of the baked crust. Add choice of toppings. Place in oven for about another 5 minutes, or until the toppings are hot and the cheese is melted. Cut into 6 slices and serve immediately!


Toppings I used:
Marina sauce with Zucchini, Onions, Mushrooms, Green and Red Peppers, Carrots (Yes, Carrots) and Tofu.
Cheeses: Pepper Jack in crust as well as on top and Sharp Cheddar on top.


Next time I think I'll try whole slices of tomatoes with green and orange peppers. 

Enjoy....I bet this won't last very long.  

-Theresa


Thursday, April 12, 2012

Brooklyn Brewery

Another amazing plus to living in NY is having a brewery less than 30 minutes away (via subway). So, last Saturday afternoon we decided to take a stroll over to Brooklyn to check out their brewhouse.

We've sampled a few of their beers since moving here; their Pennant Ale, Pilsner, Pale Ale, Brown Ale and Lager.  All not too shabby.

These days I tend to stay away from beer.  You're saying "WHAT???" right now aren't you?  Well, it's true... I am.  It's because I'm living gluten free.

**Side note: I don't have celiac disease but I do experience a few of the symptoms when I eat foods that contain gluten.  Sometimes it's difficult but it's worth it.  Contact me if you'd like to learn more.

Unfortunately, there are very few beers (both at bars and in stores) that are gluten free.  Those that are, sorry to say, aren't very tasty and I'm definitely one for a tasty beer.

Therefore, since this was a special event, this particular time I decided (which I planned on regretting later, physically) that I'd enjoy having a few beers.  Just a few - It would be silly not to at least have a taste.

Our tour started at 2pm and lasted for about 30 minutes.  One of the brewmasters explained the wonderful history - everything from their very first beer to the logo design to the forklift theft they faced to the day the ribbon was cut by Mayor Rudy Giuliani.  It was really all very interesting.

We then made our way back into the tasting area and got in line for another delicious beer.  The first one I tried was their Ama Bionda - it was fantastic.  I highly recommend it.  For my second, I gave their Weisee a try.  It was ok.  I really should have gone with the Ama Bionda again.  =)

Realizing we only had 2 more tokens (5 tokens for $20), the boys go in line for one more.  We pulled up to one of the tables, chit chatted for a bit and then made our way home.

Overall, we had a great time.  The staff was incredibly friendly (as were the watch cats), the atmosphere was enjoyable and the sunny day helped to enjoy some cold ones.

If you're looking for something to do during the week or on the weekends check out Brooklyn Brewery.  Schedule a visit - the brewery hosts a crowd of thirsty people all week long.